Tuesday, 12 September 2017

Design Embedded projects based on PIC Micro-controller at EPRLABs Chennai


Topics Covered: Electronics Circuit Design, PIC Micro-controller Programming and Projects
What is this course about?
Embedded system is the core of every intelligent device. Everything around you from a simple watch to the space ship is using embedded systems. Your mobile phones, PDAs, Washing Machines, Microwave Ovens, Automobile and all the automated electronics gadgets are having one or another form of embedded systems responsible for their intelligent functioning. 

Why should you attend training at EPRLABs ?
We are a 9 years old Embedded product development company.
All of our trainings and workshops will be conducted with only our own products and we make students to develop their own products. Recently we developed a powerful DIY educational robot named Prince.
Training sessions will be handled by industry people involved in making robots and real time embedded products. 

Why should you learn Embedded Systems?
Opportunities:
Close to 1 Lakh opening per year in India for freshers.
High Demand:
The companies are facing lot of issues in finding the right candidates; most of the graduates don’t have enough practical knowledge to identify and fix the problem while developing products.
Packages:
Though the packages are high and tend to grow exponential after getting 3+ years of experience. Initial packages offered by most of the core companies are average due to the Research bottle neck involved in it.

Objective:
Main aim of this Training module is to make the students skill full and efficient for all the hardware and software related concepts for 8051 Microcontrollers.

Date: September 16, 2017. Saturday

Duration: One day

Am I eligible?
B.E / B.Tech / M.E / M.Tech (Electronics/Electrical/CSE/IT/Instrumentation/Mechatronics disciplines)
PhD. students of Science & Engineering streams
Job Seekers and Industry Professionals

Course syllabus:
·         The first step - identifying what to choose!
·         Hardware Circuit design
·         Software Design
·         Real time product analysis - Air conditioner, Induction stove and Mobile Phones
·         Designing a Simple Traffic Light Controller
·         Designing an Traffic light controller based on Traffic Density
·         Designing a Light meter based Street light control
·         Designing a Joystick
·         Much more to try!!!
Completely Hands-on : Coding, flashing and debugging the code!
This workshop will give a complete overview on Electronics design and software.

Course Outcome 
You can design the circuits and you will write the code at the end of the day!
You will be given 10+ projects and softwares in CD, additional kits will be supplied as per request.

 Certification:
Participants will be certified after successful completion of the workshop.

Fees:
Fee for the program is
INR 1499/- INR 499/- (inclusive of all taxes) per student.  Special offer only for first 30 registrations. 
For more information: Contact:  support@eprlabs.com / 9500038086

Student Reviews:
Krishnan Swaminathan
My name is KRISHNAN. I have been learning EMBEDDED SYSTEMS COURSE for nearly six months.During my course i have no idea of how to do projects based on embedded course and how to start a project .But after joining the course i came to now clearly about what is embedded systems and where and all it is used and gained some practical knowledge. The technical staffs also are well versed in embedded systems and they helped us in each and every class. 
Over all i have a great experience in doing this course.
Pavan Reddy Pavan 
My name is Pavan. I have been learning advanced course in EPR Labs since 1 month. And I have come to know which I don't know before coming to EPR Labs. Here we can learn from the basics very clearly and we come to know about each and every component in electronics. And the environment here is very friendly. This is best Lab to approach for the electrical engineers. I strongly suggest this to every friend of mine as well as electronics students. Any way I thank EPR Labs Alot for teaching me so much. Finally this is the best place to learn about complete electronic components and there uses in various applications.
Read reviews from previous batch students here

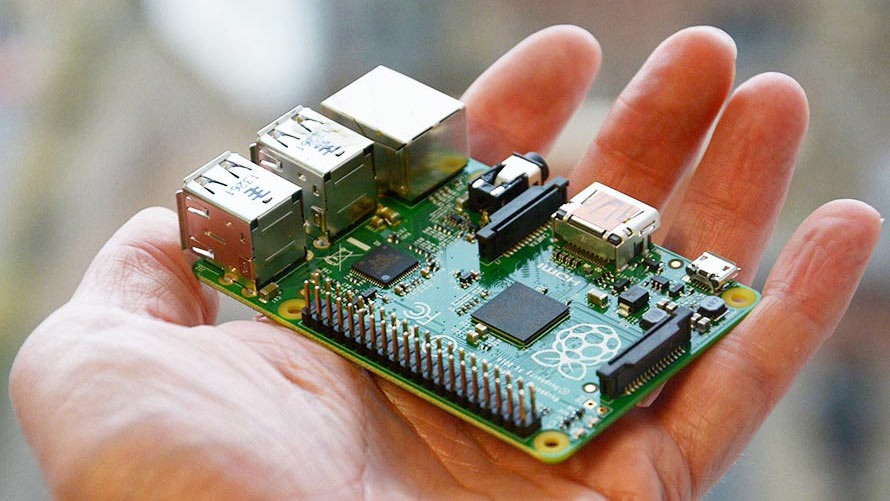
IoT, Gadget design and Advanced Robotic Programming using Python (Raspberry PI) at EPRLABs Chennai

Topics Covered: Linux, GCC Programming, Raspberry PI, Python, Gadget design, IoT, Robotics and Alexa voice assistant.

Duration: 54 Hours (9 Consecutive Sundays) . Sep 17th to Nov 12th, 2017. 10 AM to 4 PM

What is the course is about?
The course is about latest technologies used in Gadget making, Robotics and iot.  This training organising for students/people who is serious about exploring each and everything in technology.
From the training you will learn how to make gadgets like digital camera, mp3 player and high end robot which can speak, listen, and connect to internet through IoT, home automation, surveillance and endless applications.
 It helps you to make projects on your own.

Why should you attend training at EPRLABs ?
We are a 9 years old Embedded product development company.
All of our trainings and workshops will be conducted with only our own products and we make students to develop their own products. Recently we developed a powerful DIY educational robot named Prince.
Training sessions will be handled by industry people involved in making robots and real time embedded products. 

Eligibility:  
B.E / B.Tech / M.E / M.Tech (Electronics/Electrical/CSE/IT/Instrumentation/Mechatronics disciplines)
PhD. students of Science & Engineering streams
Job Seekers and Industry Professionals

Day 1 - Understand Linux and Raspberry PI 
Introduction to Linux Operating System
Linux based Board analysis – Raspberry Pi, Intel Edison and Beagle Bone
Overview of Raspberry Pi
Pin details of Raspberry Pi
Making Boot file
Understanding Make file and Script file concepts
Programming Environment – GCC and Nano Editor
Programming  the first code!


Day 2 - GCC Programming in Raspberry PI 
C Programming Syntax
Dealing with Audio and Video
Handling Ports
Sample Project:
Designing voice based Human Alert System


Day 3 -  Python Programming in Raspberry PI
Python Programming Syntax Conditional
loops and data types in Python 
Dealing with Ports Protocol Programming 
Sample Project 
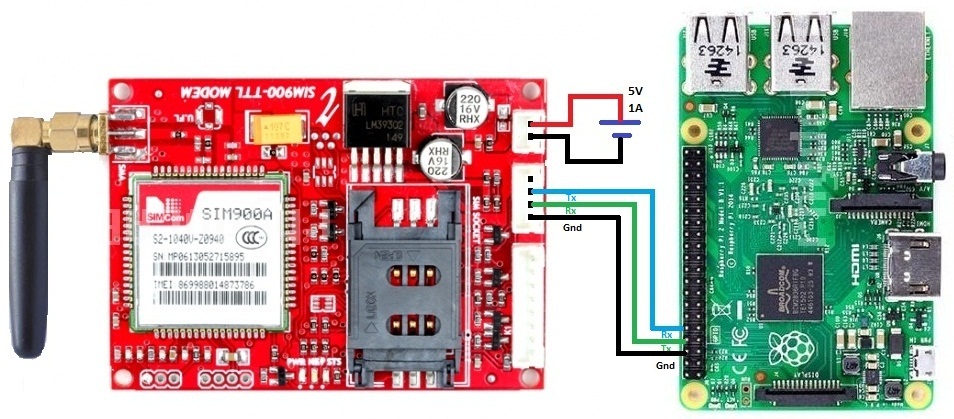
Designing SMS Management System using Raspberry PI


Day 4 - Understanding Hardware 
Designing Add on Card for Raspberry
What is ADC, PWM and Level Convertors?
Programming the Hardware using python or C


Day 5 - MP3 Design using Raspberry PI 
Understanding Amplifier Concepts
Understanding packages
Interfacing switches thro I2C
Writing code to control the playlist


Day 6 - Digital Camera Design using Raspberry PI
Requirement study and specification
Saving image options like pixel, timestamp details
Designing camera options and modes switches
Zoom in/out, black and white and sepia modes
File storage
Coding altogether through C and Python.


Day 7 - IoT Design using Raspberry PI 
Web-server overview
Creating HTML Page
Connecting Raspberry GPIO to Web interface
Writing the Code in C or Python
Making everything work.


Day 8 - Designing High End Robots based on Raspberry PI
Designing a Robot like Chitti 
Making the Robot to see 
Making the Robot to listen 
Making the Robot to Speak 
Servo Motor Control and Programming 
I2C Protocol Programming using Raspberry PI 
Training the Robot with AI(Alexa Voice Assistant, Google Voice Assistant) into it. 
Make the Robot to do addition tasks!


Day 9 - Queries, Competition and Internship Opportunity 

Total Fees:
Fee for the program is
INR 13399/- INR 8499/- (inclusive of take away kits and all taxes) per student.  Special offer only for first 30 registrations. 
Registration fee is 999 INR. Renaming fee will be collected at Day 1 Training. 
For more information: Contact:  support@eprlabs.com / 9500038086

Take away Kits for all participants  EPRLABs PI-BOT Board
 Features of out take away kits: 
 Digital MEMS MIC
  Audio Driver
  Motor Driver
  Servo Driver
  Co-processor Interface
  20 PIN - Programming Interface for Making Gadgets/Robots

Certification:
Participants will be certified after successful completion of training. Certificates authorized by MSME. 

Location:
EPRLABs Kodambakkam, 14,2nd Street Andavar Nagar, Chennai, Tamil Nadu, India
Note: *  Course will be paused during semester exams and resume after the exams
  

Fully assembled ready to print - 3d printer at eprlabs chennai


3dprinter arrived and assembled at eprlabs chennai demo videos and workshop soon


Monday, 5 December 2011

EPRLABS: Presenting SIMPLE LED CUBE

http://www.eprlabs.com/2011/10/presenting-simple-led-cube/

Presenting SIMPLE LED CUBE


BLOCK DIAGRAM:
leddcube
Parts Needed:
1.Led
2.Microcontroller
3.Battery

1.Led:
led is used for indication
 
2.Microcontroller:
AT89s52 is to controlling the led
 
3.Battery:
9v,rechargable battery
How it works:
Connecting led in matrix format in microcontroller ports. Glowing each led will give 3d effect which is used for decorative purpose

Circuit Diagram:
code:
org 0x00
loop:
               ;top to bottom
mov r0,#05
l1:
mov p1,#0f7h
mov p2,#0ffh
mov p3,#0ffh
call delaY
mov p1,#0fbh
mov p2,#0ffh
mov p3,#0ffh
call delay
mov p1,#0fdh
mov p2,#0ffh
mov p3,#0ffh
call delay
mov p1,#0feh
mov p2,#0ffh
mov p3,#0ffh
call delay
mov p1,#0fdh
mov p2,#0ffh
mov p3,#0ffh
call delay
mov p1,#0fbh
mov p2,#0ffh
mov p3,#0ffh
call delay
mov p1,#0f7h
mov p2,#0ffh
mov p3,#0ffh
call delay
djnz r0,l1
;left to right
mov r0,05
l2:
mov p1,#00h
mov p2,#00h
mov p3,#0f0h
call delay
mov p1,#00h
mov p2,#00h
mov p3,#0fh
call delay
mov p1,#00h
mov p2,#0fh
mov p3,#00h
call delay
mov p1,#0f0h
mov p2,#0f0h
mov p3,#00h
call delay
mov p1,#00h
mov p2,#0fh
mov p3,#00h
call delay
mov p1,#00h
mov p2,#00h
mov p3,#0fh
call delay
mov p1,#00h
mov p2,#00h
mov p3,#0f0h
call delay
djnz r0,l2
             ; rain flow
mov r0,#07
l4:
mov p1,#0feh
mov p2,#0ffh
mov p3,#0ffh
call delay
  mov p1,#0fdh
mov p2,#06h
mov p3,#00h
  call delay
mov p1,#0fdh
mov p2,#00h
mov p3,#06h
call delay
mov p1,#0fbh
mov p2,#00h
mov p3,#06h
call delay
mov p1,#0fbh
mov p2,#00h
mov p3,#06h
call delay
 mov p1,#0f7h
mov p2,#0ffh
mov p3,#0ffh
call delay
djnz r0,l4
           ;rain flow left to right
mov r0,#07
l6:
mov p1,#00h
mov p2,#00h
mov p3,#0f0h
call delay
  mov p1,#0fdh
mov p2,#06h
mov p3,#00h
  call delay
mov p1,#0fdh
mov p2,#00h
mov p3,#06h
call delay
mov p1,#0f0h
mov p2,#0f0h
mov p3,#00h
call delay
  djnz r0,l6
    ;rocket flying
  mov r0,#5
rocket:
mov r1,#75
loop9: mov r2,#75
loop10:
mov p1,#07h
mov p2,#00h
mov p3,#02h
djnz r2,loop10
djnz r1,loop9
mov r1,#75
loop11: mov r2,#75
loop12:
mov p1,#0bh
mov p2,#00h
mov p3,#02h
djnz r2,loop12
djnz r1,loop11
mov r1,#75
loop13: mov r2,#75
loop14:
mov p1,#0dh
mov p2,#00h
mov p3,#02h
djnz r2,loop14
djnz r1,loop13
mov r1,#75
loop15:
mov r2,#75
loop16:
mov p1,#0eh
mov p2,#00h
mov p3,#02h
djnz r2,loop16
djnz r1,loop15
mov r1,#255
loop6:
mov r2,#255
loop5:
mov p1,#0feh
mov p2,#0ffh
mov p3,#0ffh
djnz r2,loop5
djnz r1,loop6
          ;rocket burst
mov r1,#75
loop17: mov r2,#50
loop18:
mov p1,#0eh
mov p2,#52h
mov p3,#92h
djnz r2,loop18
djnz r1,loop17
mov r1,#75
loop19:
mov r2,#50
loop20:
mov p1,#0eh
mov p2,#0b4h
mov p3,#26h
mov p1,#0dh
mov p2,#52h
mov p3,#0bah
djnz r2,loop20
djnz r1,loop19
call delay
call delay
call delay
djnz r0,led
call led1
led:
call rocket
led1:
 ;snake left to right
mov r4,#5
l02:
mov p1,#0f7h
mov p2,#0f0h
mov p3,#00h
call delay
mov p1,#0fbh
mov p2,#0f0h
mov p3,#00h
call delay
mov p1,#0fdh
mov p2,#0f0h
mov p3,#00h
call delay
mov p1,#0feh
mov p2,#0f0h
mov p3,#00h
call delay
mov p1,#0feh
mov p2,#0fh
mov p3,#00h
call delay
mov p1,#0fdh
mov p2,#0fh
mov p3,#00h
call delay
mov p1,#0fbh
mov p2,#0fh
mov p3,#00h
call delay
mov p1,#0f7h
mov p2,#0fh
mov p3,#00h
call delay
mov p1,#0f7h
mov p2,#00h
mov p3,#0fh
call delay
mov p1,#0fbh
mov p2,#0h
mov p3,#0fh
call delay
mov p1,#0fdh
mov p2,#00h
mov p3,#0fh
call delay
mov p1,#0feh
mov p2,#00h
mov p3,#0fh
call delay
mov p1,#0feh
mov p2,#00h
mov p3,#0f0h
call delay
mov p1,#0fdh
mov p2,#00h
mov p3,#0f0h
call delay
mov p1,#0fbh
mov p2,#00h
mov p3,#0f0h
call delay
mov p1,#07h
mov p2,#00h
mov p3,#0f0h
call delay
djnz r4,l03
call led2
l03:call l02
 ;snake right to left
led2:
mov r5,#5
l04:
mov p1,#07h
mov p2,#00h
mov p3,#0f0h
call delay
mov p1,#0fbh
mov p2,#00h
mov p3,#0f0h
call delay
mov p1,#0fdh
mov p2,#00h
mov p3,#0f0h
call delay
mov p1,#0feh
mov p2,#00h
mov p3,#0f0h
call delay
mov p1,#0feh
mov p2,#00h
mov p3,#0fh
call delay
mov p1,#0fdh
mov p2,#00h
mov p3,#0fh
call delay
mov p1,#0fbh
mov p2,#0h
mov p3,#0fh
call delay
mov p1,#0f7h
mov p2,#00h
mov p3,#0fh
call delay
mov p1,#0f7h
mov p2,#0fh
mov p3,#00h
call delay
mov p1,#0fbh
mov p2,#0fh
mov p3,#00h
call delay
mov p1,#0fdh
mov p2,#0fh
mov p3,#00h
call delay
mov p1,#0feh
mov p2,#0fh
mov p3,#00h
call delay
mov p1,#0feh
mov p2,#0f0h
mov p3,#00h
call delay
mov p1,#0fdh
mov p2,#0f0h
mov p3,#00h
call delay
mov p1,#0fbh
mov p2,#0f0h
mov p3,#00h
call delay
mov p1,#0f7h
mov p2,#0f0h
mov p3,#00h
call delay
djnz r5,l05
jmp loop
l05:
call l04
delay:
mov r1,#200
loop1:
mov r2,#150
loop2:
djnz r2,loop2
djnz r1,loop1
ret
end

4 Way Traffic Light Controller using Microcontroller


BLOCK DIAGRAM:
4way traffic light
PARTS Needed:
1.MICROCONTROLLER
2.RESISTOR
3.LED
4.BATTERY
1.MICROCONTROLLER:
AT89S52 IS A CONTROLLER WHICH IS USED TO CONTROLL THE LED
AT89s52
2.RESISTOR:
330OHM RESISTOR IS USED TO RESIST THE SUPPLY WHICH WE HAVE GIVEN
resistor
3.LED:
led is to visit the output
led
4.BATTERY:
9v, RECHARGABLE BATTERY
battery
HOW  IT  WORKS:
Microcontroller turns the port on and off with which we connect the LEDs.
Key thing is how the expected time delay is achieved.
CIRCUITDIAGRAM:
CODE:
 org 0x00
 loop:
   mov p2,#0f1h
   clr p1.0
   call delay
   setb p1.0
   call delay
   mov p2,#0e1h
   call delay

   mov p2,#0f2h
   clr p1.1
   call delay
   setb p1.1
   call delay
   mov p2,#0d2h
   call delay
   mov p2,#0f4h
   clr p1.2
   call delay
   setb p1.2
   call delay
   mov p2,#0b4h
   call delay
 mov p2,#0f8h
   clr p1.3
   call delay
   setb p1.3
   call delay
   mov p2,#78h
   call delay

   jmp loop
 delay:
   mov r1,#2
 l1:
   mov r2,#212
 l2:
   mov r3,#255
 l3:
   mov r4,#255
 l4:
   djnz r4,l4
   djnz r3,l3
   djnz r2,l2
   djnz r1,l1
   ret
   end
HEX CODE:
:1000000075A0F1C29012004FD29012004F75A0E17E
:1000100012004F75A0F2C29112004FD29112004F00
:1000200075A0D212004F75A0F4C29212004FD29266
:1000300012004F75A0B412004F75A0F8C2931200C1
:010040004F70
:10004100D29312004F75A07812004F02000079027E
:0F0051007AD47BFF7CFFDCFEDBFADAF6D9F222F1
:00000001FF